Tuesday, November 30, 2010

A COOKIE ENCORE


COOKIE TIME IS HERE ......Cookies move to the head of the class during the holidays and folks get crazy with their cookie recipe swaps. I first printed this recipe a year and a half ago, but I know that its asking a lot for any readers to go to the archives or the recipe list and find something interesting in here, so I'm making it easy and sticking this recipe in your face....again. Cause it's that good.


OUR FAVORITE CHOCOLATE CHIP COOKIE

Baking good cookies usually doesn't happen the first time a novice baker pulls out a recipe, cookie sheet and a mixer. Nope. Even that first time you slice into a roll of prepared cookie dough, chances are you're gonna be disappointed with the results. Too many things can go wrong if you aren't experienced in the fine art of baking cookies. You have to have a dependable oven, and by that I mean one that doesn't fluctuate in temperature 50 to 75 degrees, and you better know the difference in baking times for a dark colored, light colored, or shiny cookie sheet. Do you really have to put the cookies 2 inches apart? And do you grease the pan even if the batter has a whole stick (or two) of butter in it? What difference does it make if I don't know if the flour in my canister is All Purpose or Self Rising? And nobody who doesn't bake regularly has brown sugar on hand that isn't as hard as a brick.....surely you can just double the amount of regular sugar the recipe calls for. Right? I can...right? Hmmmmm....
People, this is why some folks who cook don't bake. It's like chemistry. An exact science. Strict guidelines. You have to measure. And plan ahead...... like making sure you have some ingredients at room temperature. Don't try to mix in that stick of butter straight from the fridge. Ain't gonna happen.
Even the prepared cookie dough in the tube can fail miserably if you get any of the aforementioned rules wrong. The wrong pan or 25 degrees too hot or even when it says bake for 9 to 11 minutes and you're off by 1 minute and you start smelling that cookie smell.....by then it's probably too late and you're cookies bottoms are toast. It takes time, patience and batches of cookies to begin to feel remotely confident that every batch you bake is gonna turn out great. The margin for error is high simply because too many things can go wrong.
I do not use shiny cookie sheets anymore. I keep a thermometer in my oven. I buy parchment paper now. But most importantly, I read the recipe all the way through before I begin and I follow the recipe exactly. Using real measuring cups with actual amounts listed on the side and measuring spoons. A measuring teaspoon spoon and a measuring tablespoon spoon. I guess you could say I act more grown up when I'm baking. I save the experimentation and over seasoning for the more easily adaptable (or repairable) casseroles and meat loafs.
I have to admit that since I really applied myself a few years ago my baking has improved. I don't play around when I'm baking. I'm dead serious and not nearly as much fun as I am when I get to pull out all my herbs and spices, cheeses and creams. Nope, not much fun until after the baking, that is. Then it's payday!! There's nothing like that bite of something chocolaty or gooey when it's still warm from the oven. I am a Hero then. A real chip off the ole June Cleaver!
I'm still not as confident baking as I am with my pots and pans, skillets and grills, but I'm gonna keep at it till I can call myself a baker and mean it. And I'll scrape the brown bottoms of cookies in the meantime!!
Below is our favorite Chocolate Chip Cookie Recipe here at The Schmidt House.....Nothing fancy here and no big secrets. I got it off the bag of Gold Medal flour a coupla Christmas' ago and they're great. So be brave... and get your butter out, check your brown sugar and cut you some sheets of parchment paper. We're gonna bake us some cookies!!!

BUTTERY CHOCOLATE CHIP COOKIES
1 1/2 cups butter or margarine, softened
1 1/4 cups granulated sugar
1 1/4 cups packed brown sugar
1 tablespoon vanilla
2 eggs
4 cups Gold Medal® all-purpose flour
2 teaspoons baking soda
1 teaspoon salt
1 package (24 ounces) semisweet chocolate chips (4 cups)
1. Heat oven to 350ºF. Mix butter, sugars, vanilla and eggs in large bowl using spoon. Stir in flour, baking soda and salt. Stir in chocolate chips.2. Drop dough by rounded measuring tablespoonfuls about 2 inches apart onto ungreased cookie sheet.3. Bake 12 to 15 minutes or until light brown. Cool slightly. Remove from cookie sheet to wire rack; cool. Pat yourself on the back and ENJOY!!!

Saturday, November 20, 2010

A Little Bit Comfort, A Little Bit Rock 'N Roll: Brine It For "GOODNESS" Sake!

A Little Bit Comfort, A Little Bit Rock 'N Roll: Brine It For "GOODNESS" Sake!

Brine It For "GOODNESS" Sake!

Here I go again, so for those of you who have heard this sermon before, I apologize. And if you haven't followed my lead....time to do so. For any new converts, I want to share of the very best cooking tips I know of and one that is so essential this time of the year, in particular.
I have gone on and on in past blogs about the benefits of brining a bird. Big bird, little bird, fried or roasted. If you've never tried it, do yourself a favor and make this the year you take that leap of faith and take a walk on the wild side....so to speak. When I first started brining my holiday turkey a few years ago, brining was not really very mainstream, but you can bet a few really great turkey recipes had brining as a big part of that magic ingredient lots of us could never quite put our finger on or get right. Now brining is out of the closet and rightfully so. The method is front and center of every Thanksgiving edition of all the cooking magazines and on every Food Network rerun between now and Christmas. I like to think I was cutting edge: You know.....brining when brining wasn't cool.
There are several brining recipes out there and you can pretty much count on all of them. The trick is to get the right ratio of saline (salt) and liquid. I am a purist, using water or a combination of apple cider and water, with salt, but the newest versions offer up all kinds of concoctions adding peppercorns, any poultry herb or seasoning you usually reserve for the bird, and some of the good ole southern versions, use sweet tea or tea bags. Yes, really.
I guarantee you will have the moistest turkey ever and everyone will ask you how you did it. I brine anything with wings before roasting, frying or baking. So, go find a big, ole cooler and get ready to knock their socks off with your new Thanksgiving tradition.
I'm giving you the link to Alton Brown's recipe 'cause you brining doubters might trust his credentials more than mine. Why him being a Food Network Star, Food Scientist, Referee of the Iron Chefs and all....I'd say he has some "chops" and knows his "stuff"-ing. You'll thank me later when you become a convert and baptize your bird in brine for the first time.
My version? I use water and salt, a cooler and some ice. An elementary version of My Roasting Recipe? Simply said......
Rinse your brined turkey and dry well. Make sure you pat the skin dry. Then I put unsalted butter under under the skin of the breast and legs, and smear lots more all over. Then salt and pepper inside and out, and a few sprigs of fresh sage, parsley and thyme in the cavity with a split, unpeeled onion. Last year I threw in a couple of carrots cut in two and a coupla ribs of celery with the leafy tops. I don't go coo-coo with rosemary because I think it's a bit too strong, tho it does look pretty as a garnish on the platter. I am fortunate that I have fresh herbs year 'round (thanks, Geraldo!!!) and one of my happiest moments is when I go out to harvest them for a big holiday meal. I keep a small saucepan of unsalted butter on a warm back burner so I can baste the turkey for the last hour of cooking. I also use the turkey drippings to baste with. (All this goodness at the bottom of the pan mixed with a little flour and chicken stock make for a delicious pan gravy.) I start my bird breast side up and high heat. Around 400-425 for 45 minutes, till the breast starts getting nice and golden brown, then I adjust the oven to 350 and cook till a meat thermometer reads 180. (Don't cook your turkey for 4 hours like folks used to. That's a little long, unless you got a giant turkey. That's a whole 'nother blog!!) Make sure to read the cooking and time directions that come on the label of your bird and go by that. And please, do use a meat thermometer when you think it might be done. Rotate the turkey in the oven for even browning and if any parts start getting too brown, use some aluminum foil to cover them.
Let your finished turkey rest on the counter, tented in foil for at least 30 minutes before carving. There is a lot of cooking still going on after it's out of the oven. Pinch yourself off some of that good crunchy skin when no one's looking and cut a chunk of white meat from the neck end, or a piece of dark meat from the bottom of the thigh if you prefer the dark meat. The point is, you have wrestled this delicious piece of art for 2 days, brining and roasting, and deserve first dibs. And let's face it....if you're like me, you can't wait any longer....Get 'ya some!! I feel that's just good, quality control. Now, go brine a bird and see what I've been squawking about!
Below, from the Food Network, online and published in this month's Thanksgiving edition of their magazine, is this great recipe from Alton Brown.
ALTON BROWN'S BRINING & ROASTED TURKEY RECIPE
http://www.foodnetwork.com/recipes/alton-brown/good-eats-roast-turkey-recipe/index.html

I am.....
COMFORTCOOK@gmail.com
And we are....
"AT HOME ON THE RANGE CATERING" lisagschmidt@hotmail.com
Nashville, TN- 615-525-8336
I would love to hear from you!!!

Thursday, November 11, 2010

I've Missed Y'all!!


Forgive me, Food Friends, for taking such a long sabbatical from the blogging world. I got caught up in the day to day drama that makes the world go 'round and me tired at the end of the day. Yes, I was working 8 to 5 and was tired of looking at a computer screen by the end of the day, much less spend more time at a keyboard. I no longer had the luxury to sit around in the afternoon thinking of smart, witty and clever things to blog about. It was time to get up and hit the bricks and help put some real food on the table. Earn my worth, so to speak. I prefer blogging, but the pay is lousy!


'Nuff said! Tho, I am still on the clock from 8 to five, Monday thru Friday, I am back for a bit altho it may be inconsistent and not quite as witty. I want to spend some time sharing some food and family stories over this holiday season. I love this time of year when a turkey gets star billing and a side dish completes the story. A food lover's favorite time of the year....along with Easter ham, Memorial Day picnics, summer barbecues, hot dogs / burgers on the 4th of July and the big labor Day finale of any and all things grillable. Food is never out of season, I just think it really gets the most attention when the leaves begin to turn and families gather inside around tables loaded with family favorites, old and new, Grandma's favorite pumpkin pie recipe, some smarty pants trying a new stuffing, and those delicious Christmas cookies that deserve their own cookbooks.


While I begin to think of something inspirational and thoughtful to blog about, I hope you will take the time to go back into the Ole Comfortcook archives and brush up on some seasonal recipes and stories. I'll be back with you soon. I've missed our time together and I'm looking forward to "seeing" you again soon!

Saturday, February 20, 2010

AS GOOD AS IT GETS


Hey Nashvillians and Carolinians!
Harris Teeter has Crab Legs on sale for $2.99 a pound! Geraldo stopped at the Brentwood Harris Teeter (LOVE that store) and picked up a big bag for 17.00 bucks that was marked down from $38.00 ($6.99 a LB)! Crab shells will be flying tonight at The Schmidt House. (Yes, I know how that sounds!)
Now, I'm not a person who sits down and eats a lot of any meal at any one sitting. I'm usually pretty tired of what makes it to the table if I've been the one doin' the cooking. I am one of the Quality Engineers in The Schmidt Kitchen (yes, I know how that sounds, too!) along with Geraldo, so there's been lots of tasting going on before the final dish hits the table. So I'm a little tired of it, quite frankly. You could say that dinner and I have been pretty intimate up to that point. I eat a little with everyone, but I'm usually up and down and up and down. But, believe me...I make trips back! I didn't get this way doing aerobics at the dinner table. But, like I've said a dozen times before...give me a table laden with appetizers and finger foods and I am one happy grazer. That's by far my favorite way to eat. A taste of everything and not a lot of any one thing. "Variety they say is the is The Spice Of Life......" Oh please... that was a cheap shot.
The one exception? Well now, I can park myself at a table and put away some crab legs. We used to go out to a favorite sports bar (slash) "all-you-can-eat" crab leg joint and this way before seafood was bastardized at those International Buffets (ugh!) Geraldo would say he'd just take a book. I do indeed take my time with the sweet crustaceans and there's been occasions when we prolly could have used a co-signer!
Crab legs? I like mine simple and often.
Here's a couple of easy ways to cook 'em....

Crab Legs

To boil crab legs, simply fill a large stock pot half full of cold water and bring to a boil. Add a tablespoon of salt and the seasoning of your choice, if any. I usually quarter a lemon and add some Old Bay or Zatarain's Crab Boil to the water. When the water begins to boil add the crab legs and reduce the heat to medium. Allow them to simmer for about six minutes. Take the crab legs out of the water, drain and they are ready to eat. I don't rinse mine, cause I like the seasoning on the shells.
TIP: If you prefer to steam them, use a wide, deep pan and just a couple of inches of water, which can be seasoned, like suggested above. Bring the water to a rapid boil, put the crab legs in a colander in the water or just drop them in...reduce to a medium simmer, cover and let them steam for about 10minutes. You can also grill them, but that deserves it's own post. There's lot of ice cold beer involved with that method and I'm not talking about on the crab.
Melt some butter in the microwave, grab some dish towels and make some elbow room at the table. Lemon wedges on the side and hush anyone who bemoans the fact that you have to "work too hard" to eat them. Sissies. Those are the usually the folks who never cook....ever! Food folks know you gotta put some love and a little effort into anything that comes out delicious! Get to crackin'! And always.....Comfort and Joy!
COMFORTCOOK
"At Home On The Range Catering"
615-525-8336


Friday, February 19, 2010

SOUTH OF THE BORDER


As I was stuck in traffic this morning in front of my favorite little neighborhood grocery, Comptons (mentioned in past posts for their superb meat department), I noticed that along with a great sale on split chicken breasts (always buy them on the bone, Thank You!) they have pork butts on sale for 98 cents a pound. This is not the cheapest I've seen them, but a very decent price and I'm always ready to go "Pork." So, I am putting the pork butt on my shopping list for the weekend and plan on making some Pork Adobada sometime soon. I have spoke about this recipe before , but it is definitely worth another mention. It is so easy and soooo GOOD! Great leftovers and if you need to, it freezes well, also. I love the taste of authentic Mexican food and this dish has all those deep, rich flavors that are so satisfying and just tastes like nothing else. "Nothing else" in my neighborhood, that is! (Ok, maybe those folks on the corner of Town Valley Court and Tea Garden may have a similar recipe, but I know I've got this convered on Pekoe Circle.)

So read the recipe below. Go find a good deal on a Pork Butt and try this dish. If you love Pork, you'll put this one in the recipe box and go back to it again and again. If you love complex, interesting, deep flavors, you'll love this. If you have a crock pot and want to razzle dazzle some company with something totally different and impressive and have time to sit and spend time with them instead of fretting over a stove...this dish is the one for you. Damn! Just try this dish! Don't be intimidated by roasting the peppers. It's good to learn a little trick every now and then, plus you'll feel like a million bucks and proud of yourself after you do it and wonder why you avoided any recipes that called for roasted peppers before. It is a whole new method to adding a lot of flavor to your cooking. It may not be the most complex of Mexican dishes, but it sure as heck isn't Taco Bell! After this you'll be ready to try the Chili Rellenos with Picadillo recipe. That one has some really interesting flavors going on...raisins, cinnamon, clove...I know the combination sounds strange to us gringos, but wow...it is delicious. For sure Chili Rellenos its a lot more more hands on than this, but they are both great ethic additiosn to your recipe box.


COMFORTCOOK -
"AT HOME ON THE RANGE CATERING"
Nashville, TN 615-525-8336
http://www.comfortcook@gmail.com/


PORK ADOBADA

Ingredients:

6 New Mexico Anaheim dried red chilies
4 dried Ancho peppers (These are the dark red dried peppers. Dried Poblanos, actually)
1/2 cup cider vinegar
1 medium onion, chopped
5 garlic cloves, chopped
1 tablespoon ground cumin
1 cup chicken stock
2 tablespoons frozen orange juice concentrate
2 tablespoons brown sugar
2 tablespoons tomato paste
1-2 teaspoon olive oil
1 tablespoon all-purpose flour
3 lbs lean pork, cut into bite-sized pieces (I use Pork Butt , but you could use a loin.)
salt and pepper, to taste


Directions:
Tear chili pods into pieces, removing steam and reserving seeds.
Place chili on baking sheet, preheat oven to 350 degrees.
When oven is hot roast the chili for 10 minutes.
Place the chili in blender container.
Bring the chicken stock to a boil, add cider vinegar and pour over chili.
Allow to sit for about 10 to 15 minutes to soften chili.
Add orange juice concentrate, tomato paste, brown sugar and cumin.
Blend into a smooth paste, add 1 tablespoon of the chili seeds and blend until smooth.
Warm olive oil in skillet, add onions and garlic.
Saute until onions begin to brown lightly then pour onions into crock pot.
Toss the pork with 1 tablespoon of flour.
In same skillet add pork cubes and brown stirring frequently.
May need to brown the meat in batches to ensure even browning,.
As meat is browned, transfer to crock pot.
When all the meat has been browned, pour 1/2 cup water into skillet, bring to a boil and scrape up browned bits.
Pour into crock pot along with chili sauce, stirring well.
Cover and cook on low 4 to 5 or until pork cubes are tender.
Serve with some great garnishes such as Cilantro, grated cheese or Queso Fresco, diced tomatoes, onions, lettuce, lime wedges, Sour Cream and flour and corn tortillas. Let everyone build their own combination. Have lots of Frosty, Cold, Barley Pops (BEER!!) on hand!! El- Schlurpo!


BIG TIP: The Pork Butt is a moister cut of pork than a loin and pork tenderloin would just disintegrate in a crock pot after that amount of time. Pork Loin would work but would be drier. Also, ANYTIME you are using your crock pot, add a layer of foil to the top before putting the crock pot lid on. And NEVER!!! take the lid off during the cooking time. I know it sounds like an exaggeration, but you lose 20 - 30 minutes cooking time each time you "peek" in your crock pot. Have Faith!!

Wednesday, February 10, 2010

Rum Balls!!!!

My friend Debbie made these Rum Balls for a get-to-gether we had last week. They are so delicious and she swears they are very easy to make! They do have bit of a punch, so be forewarned and just so you know, the alcohol isn't baked or cooked out. Try 'em, cause they are really delicious!!! Great recipe, Debbie...Thanks So Much!

Chocolate Rum Balls

1 Box (12 ozs.) Vanilla or Chocolate Wafers
1 c. chopped finely nuts (I used pecans)
1 c. confectioners’ sugar (divided)
1 c. semi sweet chocolate chips
½ c. light corn syrup
1/3 c. bourbon or rum (I used ½ c. rum)

In a medium-size mixing bowl, combine crushed wafers, pecans, and 1/2 cup confectioners' sugar; set aside. In a double boiler over simmering water, melt chocolate morsels with corn syrup. I did melted the chocolate chips in the microwave. I placed the chips in a microwave glass dish, and put them in for 20 seconds, stirred and then placed back in for 15 seconds, and then 10 seconds thereafter until they were melted. Add Bourbon or rum; stir until smooth. Pour chocolate mixture over wafer mixture. Stir to combine thoroughly. Shape mixture into 1-inch balls; place on waxed paper.
Place remaining confectioners' sugar in a shallow bowl. Roll balls in confectioners' sugar; place on waxed paper in a container, adding more waxed paper between layers, or place in small paper or foil candy cups. Store in airtight container for about 3 days before serving. Store for up to 2 weeks.Makes 4 dozen. I keep them in the refrigerator.
Have fun and enjoy!

GOODNESS GRACIOUS!

GOODNESS GRACIOUS!
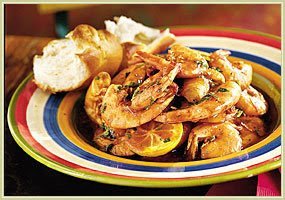
Does it get better than this?

BARBEQUE SHRIMP

BARBEQUE SHRIMP
NEW ORLEANS STYLE!!

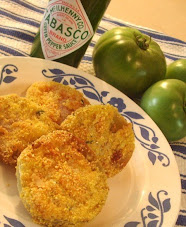
GREEN GOODNESS

GREEN GOODNESS
Ya gotta make you some of these!

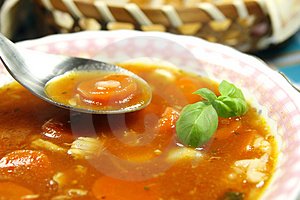
SCHLURRRRP!

SCHLURRRRP!
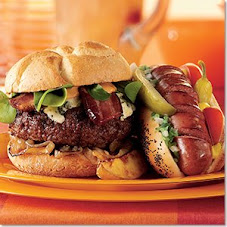
Grilling Burgers? 10 Great Recipes

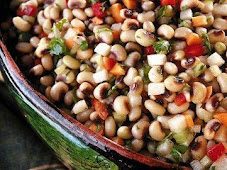
TENNESSEE TEXAS CAVIAR

TENNESSEE TEXAS CAVIAR
This is Soooo good!!

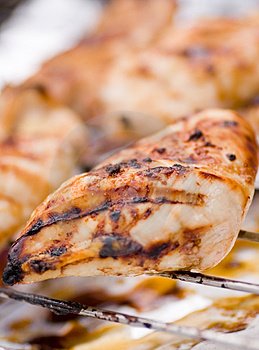
CUBAN MOJO CHICKEN

CUBAN MOJO CHICKEN
Light, And Flavorful!!

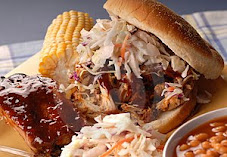
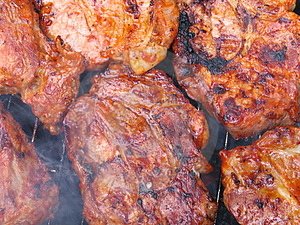
BAR- B -CUED PORK...SCHLURP!!!

BAR- B -CUED PORK...SCHLURP!!!
GREAT TASTING PORK STEAKS!

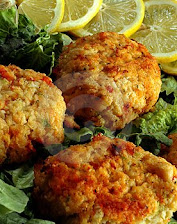
CRAB CAKES

CRAB CAKES
Wolfgang Puck's Great Recipe Here

FRESH FISH

FRESH FISH
Delicious, Fresh Orange Roughy Recipes

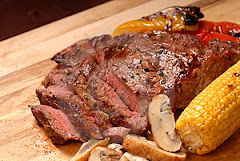
STEAK, STEAK, STEAK

STEAK, STEAK, STEAK

Labels

BlogCatalog

home Blogs - BlogCatalog Blog Directory

Blog Archive

Powered By Blogger

SCHLURP!!!!

SCHLURP!!!!