Sunday, October 7, 2012

Chowder Time In Tennessee

Yep, when the air starts getting colder, we all think about steaming bowls of chili or big pots of vegetable beef soup.  I had my beef soup craving satisfied last week with the ole, reliable Cabbage Beef soup that we've chowed on for years.  It's a recipe straight out of the Tennessean newspaper from about 20 years ago where someone had written in requesting the recipe for Shoney's Cabbage and Beef Soup.  I've hung on to the scrap of paper, now squirreled away in my "Mom's Favorite Recipes- Grab This Book In Case Of Fire" Cookbook.  One of these days, I'm gonna get all those bits of paper and clippings organized.  At least they are all in the same general area of the house.  And having this blog has been a really big help in getting some of the family favorites down for prosperity. That's almost funny.

I didn't do a brothy  (is brothy a word?) soup today.  I was online for awhile this afternoon and after looking at all the "purty pictures" of food on Pinterest and all the cooking sites, I wanted a stand up soup.  Something really substantial and creamy.  So, I started making potato soup and then that does, like it usually does, well, it evolves into something with cheese, more vegetables and bacon.  So, another chowder is born.  And since I had a poblano and a hankering for a little kick, I added some diced poblano at the last minute and a Southwest Chowder ended up in the pot.  And you know what?  It's  really good.  I'm gonna share the recipe with you.  Dress it up anyway you want.  I'm betting cheese makes it on top and some sour cream is sitting close by.  Enjoy fall, it's a great time to dig out those old newspaper recipes you have shoved into a drawer somewhere and make that dish you always wanted to make.  Steam up your windows and make a memory!

Southwestern Corn, Chili and Queso Chowder
½ large sweet Onion- diced
2 ribs celery with leaves on-diced
3 large cloves garlic-minced
1 TBS Margarine or Butter
1 Tbs Olive Oil
1 TBS Bacon drippings
2 Large Russet Baking potatoes (equal to 3 Cups cubed)
2 Cups Frozen Whole Kernel Corn (or fresh, if available)
2 Cups frozen Hash Browns
1/3 Large Poblano Pepper, cut into small dice-no seeds or stems
¾ Cup Real Bacon bits (or real Bacon, cooked and fat rendered & reserved)
 1 1/2 Cups Half and Half 
1 Cup Milk
White Queso- Mexican melting cheese -Diced, about ½ Cup (more if you want it really cheesy, but you can do too much)
2 TBS Chicken Base*  
1 1/2 Cup Water
Fresh Thyme- 4 sprigs
Salt and Pepper
  
Bring potatoes to boil and cook till medium tender, not falling apart. Drain. Meanwhile, heat oil and butter (or margarine) in dutch oven over medium heat. Add diced onions and celery, saute on gentle heat till just tender. Add a dash of salt and pepper, will season with a bit more later on in recipe. Cook 2 min. Add 1 TBS of Chicken Base and stir to coat vegetables. Add water and stir. Pot should be bubbly and thickening. Add Bacon, drain potatoes and add to vegetable mix, stirring in gently. Add corn, stir, add Half and Half. Stir. Cook 3 minutes on medium low heat, then add hash browns, dash more salt and pepper, stirring all together then add the rest of chicken base. Stirring in completely. Add fresh thyme and let it all thicken for just a minute. Then add the milk, queso and diced Poblano. Cook on low heat, stirring gently to keep from scorching. Cook on low for 15-20 minutes and can serve immediately. Top with green onions, sour cream, more queso, jack cheese or cheddar cheese.

Delicious!
* I use McCormick or Tone’s Brand Chicken Base. Available at Sam’s Club. It is a paste, not boullion. Adds a deep richness for recipes that call for chicken stock.  It is a real bargain compared to supermarket prices and I use the Beef and Chicken bases all year round.  A must have staple for me.

Tuesday, July 24, 2012

A Little Black Magic In The Kitchen

In previous posts, I have mentioned (often and emphatically) that I am a cook, not a baker.  Anyone who cooks knows there is a very real difference between the two and the bakers of the world who can bake and cook, will list "Baker" before Cook on their resume, making it very clear that baking may require a bit more acknowledgement, citing the patience, commitment and something I struggle with, the ability to follow directions while using exact measurements and ingredients, while keeping on task.  B-O-R-I-N-G!
I say it's boring rather than admitting I'm impatient, scattered and I believe that having some "wiggle room" in a recipe "is my friend."
I am quite pleased with myself when a bunch of chocolate cupcakes come out of my oven and they're all (pretty much) the same height and there isn't that familiar aroma of slightly scorched cocoa in the room.  With my collection of recipes, I have gotten pretty darn good with some really delicious frostings. Frostings, that I consider cooking 'cause you can pour in the vanilla, shake in the confectioners sugar and judge how much cream cheese or butter you need considering how stiff you want  it. I know you gotta be close to the 3 or 4 cups or tablespoons, whatever, but you can "fudge" a little bit.  NOT SO with the cake part. And because I realize my strengths and weaknesses, I head right for the Duncan Hines aisle when I'm in the mood for, or have an occasion that calls for cake.
With all the great food blogs out there, not too mention my various food magazines subscriptions that temp me on a monthly basis with  mouthwatering pictures and recipes of these gorgeous cakes, cookies, pies and desserts; it's pretty damn obvious that Duncan Hines ain't got no box mix for every delicious dessert.  They have to be "made".  Someone is gonna have to bake these babies.  Apparently, I'm gonna have to learn to restrain myself, reel in the freehand  and "read the directions, Mommy."  
This is the predicament I found myself in last week while blog-hopping.  I came across a scrumptious picture of chocolate perfection beneath the title: Black Magic Cake. Uh, oh. Now, before I could look away, I was in it's spell.  Bewitched, bothered and bewildered by the name, then there was the byline stating it was the best easy chocolate cake their test kitchen had ever made.  It had been given 8 (!) Blue Ribbons.  Blue Ribbons that had been awarded by novice bakers, such as myself.  There it was.  My baking challenge. The gauntlet had been thrown.......I was gonna BAKE this cake. 
Briefly looking through the ingredients (Briefly? Really? See, I'm hopeless!), I saw that I had everything I needed, thanks to my food hoarding and generous husband (XO, Geraldo!).  I turned the oven to 350 and got started.  I only have one 9x9 cake pan, (how did that happen?)  so I opted for the 9x13 one layer version.  With flour pretty much everywhere, all my mixing bowls on the counter and a sinkful of measuring cups, I made my Black Magic Cake. . . with Chocolate Buttercream frosting, an extra added attraction.  It was delicious!  And it really was easy.   I was very pleased with myself and inspired to not be so afraid of the exactness of the measuring and the precision of the recipe.  It certainly helps that I have a new oven that I can depend on to hold the right temperature (again, XO, Geraldo!) and that there was no one else in the house that day.  It was not a pretty site, albeit a tasty one.  And it did get the kitchen swept and the floor cleaned.  Another bonus.
Here's the Recipe.  I hope you'll try it.  DO make sure you add the coffee.  I added a bit of instant coffee to some leftover breakfast coffee.  It really kicks up the chocolate taste.  

Black Magic Cake

Ingredients:

•2 cups sugar
•1-3/4 cups all-purpose flour
•3/4 cup HERSHEY’S Cocoa
•2 teaspoons baking soda
•1 teaspoon baking powder
•1 teaspoon salt
•2 eggs
•1 cup buttermilk (or sour milk*)
•1 cup strong black coffee OR 2 teaspoons powdered instant coffee plus 1 cup boiling water
•1/2 cup vegetable oil
•1 teaspoon vanilla extract
Directions:

1. Heat oven to 350°F. Grease and flour two 9-inch round baking pans or one 13×9x2-inch baking pan.

2. Stir together sugar, flour, cocoa, baking soda, baking powder and salt in large bowl. Add eggs, buttermilk, coffee, oil and vanilla; beat on medium speed of mixer 2 minutes (batter will be thin). Pour batter evenly into prepared pans.

3. Bake 30 to 35 minutes for round pans, 35 to 40 minutes for rectangular pan or until wooden pick inserted in center comes out clean. Cool 10 minutes; remove from pans to wire racks. Cool completely. Frost as desired. Yields 10 to 12 servings.

* To sour milk: Use 1 tablespoon white vinegar plus milk to equal 1 cup.

Chocolate Buttercream Frosting

Ingredients:

6 tablespoons butter, softened
2 2/3 cups confectioners' sugar
1/2 cup cocoa
1/3 cup milk
1 1/2 teaspoons vanilla

Directions:

1  Place butter in a bowl and beat until creamy.

2  Add sugar and cocoa, mixing well.

3  Stir in milk in portions, stirring each time.

4  Add vanilla.

5  Spread on cooled cake or cupcakes
Comfort and Joy!!
lisagschmidt@hotmail.com
comfortcook@blogspot.


Monday, July 16, 2012

SUMMER'S GIFTS

Reading some of the previous posts, I have to wonder why in the world I waited so long to come back to this playground and share all my toys?  I have always had so much fun writing this blog.  It would always tickle me to death when I would get a comment or see where someone had been online and came to my website to read what I had written.  Not necessarily to feed my ego, it was more of the sharing and knowing that someone was playing with me and getting to go there, too.  So with some encouragement from my biggest fan, Geraldo (XO!)  and with an "out of the blue" special request for a recipe this morning for a dear friend, I've decided to step back onto the page and let the fun begin.
There's not gonna be a long explanation with boring sidebars.  First things first, I'm trying to figure out how to set this blog up again and what button does what; what moves this where and how did that picture get there  and where did that text I just typed go?  Oh,man.   Geez, I've already lost a fried turkey, some enchiladas, a plateful of beautiful barbecue shrimp and a corn puddin'.  And,  I haven't even tried to post a picture yet.  So, jumping in head first, trusting any readers to give a gal a break....  I'm very hopeful that one or two of you will have a good laugh along the way, sharing some recipes about some good ole comfort food, with a little rockstar thrown in from time to time.
Let's start with something I love and know a lot about.  DELICIOUS CHEESE goodies!  Here's a great, easy-peasy recipe for some delicious, (really they are delicious) marinated mozzarella cheese bites that is perfect for the surplus of herbs I have in my garden and a great go to when the temperature has been a record breaking, "Hose me down, Daddy!" summer.
It's more of a method than a recipe, but all you need to know and have available is right there.  You can tweak it with more garlic, more herbs, (I do put a few sprigs of thyme in mine 'cause I love thyme) and I make sure the lemon rind pretty side shows to the side of the jar, giving it an ala, Ina Garten/ Barefoot Contessa, food "shoppe" look.
Keep it refrigerated, setting out to warm to room temp before serving with toasted bread, or drizzle over pasta, or you can make a simple salad with some olives, grape tomatoes and basil.  Hang onto the olive oil that's left, if there is any.  This is great to use for a vinagrette or cooking next time you need a great Italian punch to a dish.  Makes a great hostess gift.  Wrap a colorful ribbon or some raffia around the top and maybe a pretty Gerbera Daisy or sprig of basil from your garden tucked into the bow. 
It's nice to be back....See ya when I see ya!


Marinated Mozzarella

Ingredients

Bocconcini mozzarella (the little balls of fresh mozzarella, you can use the big ones, just cut them into bite size pieces) I buy the double pkg of mozz @ Sam's Club and just cut them into cubes.  Much cheaper and its still delicious mozzarella.

lemon peel

salt

peppercorns

garlic cloves

basil leaves

red pepper flakes

A VERY good quality extra virgin Olive Oil ( I use Colavita)

I am not giving exact measurements because the quantity is going to depend on various factors. How much cheese do you have? What size jar? You can play with the flavors. Want a more garlicky cheese? Add more garlic. You love lemon, add more lemon.  (I do.) I use a half pint or pint size jar, depending on how much I want to make and how much olive oil I have on hand.  In your jar, add about one third of the cheese. Layer in the basil leaves, peppercorns, red pepper flakes, and garlic cloves, and thyme or parsley if you have it. I've put in kalamata olives, ripe olives and big green, unstuffed olives, too. You can really play with this and make different versions for different tastes. I used about 5-6 cloves of garlic each time and I just cut them in half. Sprinkle with sea salt.

Keep layering the ingredients until your jar is full.

Pour a good quality olive oil over the top until the jar is full. Put the lid on the jar and shake it up. Put the jar in the fridge for at least two hours before you are going to serve it. You can keep this in there for about a week I would say. Give it a shake every now and again. Take the jar out about 30 minutes before you are going to serve this. The olive oil will solidify a bit and will return to normal again when it gets back to room temperature.

Pour the cheese and oil into a pretty bowl and serve with some toasted bread.  If you have a food friend or someone with alot of herbs they need to harvest, give them a copy of this recipe.  Maybe they'll invite  you over when they make it!  Goes great with wine, red or white, a cool cocktail or an ice cold beer.
 
Comfortcook is  lisagschmidt@hotmail.com
I welcome your comments or if you wanna just say "Hi!"

Friday, June 24, 2011

"T" FOR TEXAS AND A "T" FOR TENNESSEE


In an earlier post, I had talked about looking for a good recipe for a Black-Eyed Pea Salad. I came across many that were different in their own unique ways and so with a little tweaking on a "Texas Caviar" recipe, this Tennesse girl came up with a version that makes any southerner stand up and take notice. This recipe is SO good. Rumor has it that the Black -Eyed Pea Salad did originate in the East Texas town of Athens. Athens is now known as the "Black-Eyed Pea Capital of the World." They still throw a Black-eyed Pea Jamboree each year. Midsummer is peak harvest season for the "Athens Cowpeas", so it's appropriate that this salad be a part of our Independence Day celebration this year. I'm going to pack some up and head to Southern Illinois for the weekend of the 4th. Big Mom's family reunion is that Saturday @ Karel Park. The following recipe makes about 8-10 servings and can be refrigerated up to a week. Feel free to put your own spin on it. A couple of days after we first tried it, I mixed it with some fresh Pico de Gallo to switch it up a little bit and it was great. Throw in some diced avacados, cilantro, and some sour cream on the side for a great garnish for any Mexican/TexMex dish. Enjoy!!

TEXAS CAVIAR-TENNESSEE STYLE

4 Cups black eyed peas, (I used canned, drained and rinsed, but cook your own if you want, just be sure to let them cool way down before mixing anything with them.)
1 Cup celery
4 Oz chopped Green Chiles
1/4 Cup red bell pepper, finely diced
1/2 Cup purple onion, diced
2 garlic cloves, minced
1 tsp salt
1/2 tsp black pepper
1 tsp Worcestershire Sauce
1 1/2 Cups Italian Dressing, enough to cover peas
Garnish with cilantro and green onions, both the whites and tops. It all looks great on a bed of Red cabbage leaves.
In a large glass bowl combine all ingredients, except the garnish, stirring well. You may need to add more dressing to cover peas. Marinate, covered and refrigerated for 24 hours, preferably, but at least for 4 hours. Drain any excess dressing and spoon onto shallow serving bowl lined with the red cabbage leaves. Sprinkle cilantro and green onions on top.
TIP: Mix with home made Pico De Gallo (Fresh is Best!!) or a small can of Rotel (mild or hot) for another variation.

At Home On The Range Catering
Nashville, TN 615-525-8336
lisagschmidt@hotmail.com
Comfortcook

Friday, April 29, 2011

Flavors Of Cinco De Mayo


As I was stuck in traffic this morning in front of my favorite little neighborhood grocery, Comptons (mentioned in past posts for their superb meat department) I noticed that along with a great sale on split chicken breasts, always buy them on the bone, Thank You!, they have pork butts on sale for 98 cents a pound. This is not the cheapest I've seen them, but a very decent price and I'm always ready to go "Pork." So, I am putting the pork butt on my shopping list for the weekend and plan on making some Pork Adobada sometime soon. I have spoke about this recipe before , but it is definitely worth another mention. It is so easy and soooo GOOD! Great leftovers and if you need to, it freezes well, also. I love the taste of authentic Mexican food and this dish has all those deep, rich flavors that are so satisfying and just tastes like nothing else. "Nothing else" in my neighborhood, that is! (Ok, maybe those folks on the corner of Town Valley Court and Tea Garden may have a similar recipe, but I know I've got this convered on Pekoe Circle.)
So read the recipe below. Go find a good deal on a Pork Butt and try this dish. If you love Pork, you'll put this one in the recipe box and go back to it again and again. If you love complex, interesting, deep flavors, you'll love this. If you have a crock pot and want to razzle dazzle some company with something totally different and impressive and have time to sit and spend time with them instead of fretting over a stove...this dish is the one for you. Damn! Just try this dish! Don't be intimidated by roasting the peppers. It's good to learn a little trick every now and then, plus you'll feel like a million bucks and proud of yourself after you do it and wonder why you avoided any recipes that called for roasted peppers before. It is a whole new method to adding a lot of flavor to your cooking. It may not be the most complex of Mexican dishes, but it sure as heck isn't Taco Bell! After this you'll be ready to try the Chili Rellenos with Picadillo recipe. That one has some really interesting flavors going on...raisins, cinnamon, clove...I know the combination sounds strange to us gringos, but wow...it is delicious. For sure Chili Rellenos its a lot more more hands on than this, but they are both great ethic additiosn to your recipe box.

COMFORTCOOK
"AT HOME ON THE RANGE CATERING"
Nashville, TN 615-525-8336
http://www.comfortcook@gmail.com/

PORK ADOBADA

Ingredients:
6 New Mexico Anaheim dried red chilies
4 dried Ancho peppers (These are the dark red dried peppers. Dried Poblanos, actually)
1/2 cup cider vinegar
1 medium onion, chopped
5 garlic cloves, chopped
1 tablespoon ground cumin
1 cup chicken stock
2 tablespoons frozen orange juice concentrate
2 tablespoons brown sugar
2 tablespoons tomato paste
1-2 teaspoon olive oil
1 tablespoon all-purpose flour
3 lbs lean pork, cut into bite-sized pieces (I use Pork Butt , but you could use a loin.)
salt and pepper, to taste

Directions: Tear chili pods into pieces, removing steam and reserving seeds. Place chili on baking sheet, preheat oven to 350 degrees. When oven is hot roast the chili for 10 minutes. Place the chili in blender container. Bring the chicken stock to a boil, add cider vinegar and pour over chili. Allow to sit for about 10 to 15 minutes to soften chili. Add orange juice concentrate, tomato paste, brown sugar and cumin. Blend into a smooth paste, add 1 tablespoon of the chili seeds and blend until smooth. Warm olive oil in skillet, add onions and garlic. Saute until onions begin to brown lightly then pour onions into crock pot. Toss the pork with 1 tablespoon of flour. In same skillet add pork cubes and brown stirring frequently. May need to brown the meat in batches to ensure even browning,. As meat is browned, transfer to crock pot. When all the meat has been browned, pour 1/2 cup water into skillet, bring to a boil and scrape up browned bits. Pour into crock pot along with chili sauce, stirring well. Cover and cook on low 4 to 5 or until pork cubes are tender. Serve with some great garnishes such as Cilantro, grated cheese or Queso Fresco, diced tomatoes, onions, lettuce, lime wedges, Sour Cream and flour and corn tortillas. Let everyone build their own combination. Have lots of Frosty, Cold, Barley Pops (BEER!!) on hand!! El- Schlurpo!

BIG TIP: The Pork Butt is a moister cut of pork than a loin and pork tenderloin would just disintegrate in a crock pot after that amount of time. Pork Loin would work but would be drier. Also, ANYTIME you are using your crock pot, add a layer of foil to the top before putting the crock pot lid on. And NEVER!!! take the lid off during the cooking time. I know it sounds like an exaggeration, but you lose 20 - 30 minutes cooking time each time you "peek" in your crock pot. Have Faith!!

Thursday, February 17, 2011

Fry, Baby, Fry!!


I love deep fried anything. I mean really- pickles, wings, fish, potatoes, chicken, mushrooms, I even have a great recipe for a terrific fried Milky Way bar! My Euro-Pro deep fryer is a prized appliance in my kitchen that gets a steady workout. A lady was on a local TV show here in Nashville the other day and she had just won the Blue Ribbon at the Tennessee State Fair with her Deep Fried Cheese Grits (on a stick) with a tangy hot and sour sauce. You gotta appreciate that about us southerners. Not only do we have the grits , we have the grits to fry 'em, too.

One of my favorite childhood treats was when my Mom would make her Onion Rings. When my brother Allan came home from boot camp, that was one his requests.....some of Mom's onion rings. Hers are not like the thick, beer battered pub grub many of us are familiar with. They are actually thin and crispy, kinda like the Tony Roma ones they make into their famous onion loaf. Mom's was the recipe I had used for years and still love. I just happened to see a great picture of some onion rings in a magazine and they looked delicious. Not all batter-y, you know ..like the kind where you take a bite and the whole onion comes slithering out of the crust. I hate that! Nine times out of ten, they're piping hot and when you take that first bite, you end up looking very unsophisticated trying to keep it off your tongue and trying to not burn the roof of your mouth that the cheese on the pizza always gets. Yes, I have lots of experience eating onion rings, so even tho I love the old family favorite, I came up with what I have to say is quite possibly the best onion ring I have ever eaten. Consensus at The Schmidt House (and yes I know how that sounds) confirm my opinion and what really put this recipe over the top, is that when Sam came by for lunch, he heated some up in the microwave and they were just as crisp as they'd been the night before. A great revelation for a snacker like me. Listen folks, these are really good and I hope you'll try 'em. This is a great batter for all kinds of vegetables, chicken tenders, even seasoned fries. starch is I can't wait to do deep fried pickles next. Go Fry something.....it does a body good!!

Schlurp (!) Big and Crispy Onion Rings

2 Cups Buttermilk
3 Tsps Creole Seasoning-Tony's
2 Cups all Purpose flour
2 tsps sugar
4Tsps baking Powder
2 TABLESPOONS of cornstarch
2 tsps blk pepper
1/2 tsp Cayenne pepper
1 Large or 2 small Vidalia ( or sweet yellow) onions (
Peanut oil for frying

Preheat oven to 250, heat oil to 360

In a mixing bowl put 2 cups buttermilk
In another bowl, combine, the flour, baking powder,cornstarch, blk and cayenne peppers, sugar and creole seasoning.
Peel the onions and slice crosswise into 1/2 inch slices. Carefully separate into rings.
(You can prepare the onions a half hour ahead and hold the rings in ice water, at this point)
Positions a wire rack over a baking sheet. Dip the rings, one at a time, in the buttermilk and shake off any excess. Dredge the slices into the seasoned flour and shake off any excess flour. Dip the battered ring into the buttermilk again and back into the flour. Shake off any excess and transfer to the wire rack. Repeat with remaning rings.
Position a 2nd wire rack over a baking sheet and place in a warmed oven. Fill a large heavy dutch oven with 2 inches of oil, or use a deep fryer, heating both to 360. Temeperature is key!
Fry the rings in batches, adding only a few at a time to keep separate, until golden brown or when they float to the surface. About 2-3 minutes. Remove from oil and place rings onto warmed wire rack and salt them immediately. Keep warm in the oven while frying the remaining rings. Be sure to bring your oil up to temperature between batches. Salt each batch immediately when you bring it out of the oil.
Serve hot and listen to the Crunching and Mmmmmmm!!!!!!!!!!
Comfortcook @gmail.com
At Home On The Range Catering

Friday, February 11, 2011

LOVE!!!!!


Super Bowl is over and the next February food frenzy is Valentine's Day. Whether it's dinner at a romantic restaurant, chocolates or a bottle of bubbly and fondue at home, romantics everywhere know this is the time of year when there are no excuses if you forget February 14th. Now just because Valentine's Day falls on a Monday this year, you've got the entire weekend to get your romance on. You see, like it or not and try as some may, there are still certain rules that apply to this particular date. Valentine's Day is your chance to make up for any and all errs of the heart you made the previous year. Make her feel special all over again. Tell her and show her that she is indeed the most beautiful and desirable woman in all the world and you simply can't live without her. WHEW!!! That's a tall order, huh? Collect yourself and read on.....
One of the most important rules of romance is that if you are going to get flowers for your beloved, remember it is the coup de grace if you send them to her place of work so she can have that moment of girlish glory among her peers, proving that she does indeed have someone who loves her enough to send her overpriced flowers. Think of it like this...it's kind of like why guys drive those big ole trucks with those ridiculously huge tires. You know they do it for their buddies to appreciate. And maybe to make up for what they may lack in other areas. It can't be easy jumping up into that big ole thing and those knobby tires have got to be tough on the tush. It's all about the show...you know... it's human nature wanting to show off a little. Now, you could get by with bringing some flowers and a box of candy home on that day...but there's nothing like that big swell of emotion that every girl gets when she sees the top of a big bouquet passing thru the office. Us girls would be lying if we didn't admit that we all get a certain feeling in our stomach and that we hope those flowers land in front of us. It makes you, the thoughtful, romantic boyfriend, husband or lover (or as in Geraldo's- case, all 3!) the most desirable man on the planet . And just so you gals know it, it's perfectly alright to take your flowers home and share them with that marvelous man who thought enough of you to take the time to make a call or two to make sure your day was special. You can leave them on your desk at work, certainly, but it is nice that the man who footed the bill gets a chance to see how his dollars stacked up. Take a few out and put them in a bud vase for your desk. That way you can be reminded each day (hopefully for at least a week) at home and at work, that you are indeed....adored. You may get lucky and get held up at a stop light and the folks in the car next to you will spot your flowers or balloons and know that you are very special to someone and that their better-half had better have something valentine-y for them when they get home. And yes, balloons work, too. Just make sure you get an embarrassing amount that will make a statement.
There's not a thing wrong dropping by the corner market for your sweetie's flowers. Just try not to get stuck buying the cellophane wrapped spring bouquet that has already "sprung." Pick out something that's fresh 'cause a bunch of wilted flowers says, deadbeat and you didn't care enough to send the very best. Crappy flowers are all that's left? Well then you're better off with helium balloons, a very mushy card and a big, BIG heart-shaped box of some fine chocolates. Having said that.... let me add that there are some great floral options available if you decide to pick up something on your own to bring home to the missus. Many of the large grocery chains have a great selection of many different flowers that you can pick and choose from to make your own clever creation. With the right touch, any proper suitor can pull this off. First of all, buy the kind of flowers your sweetie likes. Don't buy roses just because they're everywhere this time of year. I used to not be such a big fan of roses...seemed overpriced and didn't last very a long if you asked me, but since I've been growing them in my home garden for a few years I have truly learned to appreciate just how beautiful and special they are. Just make sure you put some thought into it. Any flowers you give her are going to say more to her than any words you could ever come up with. NOT getting her flowers will also say more to her than you could ever apologize for!! If your girl likes sunflowers, then make it sunflowers. If it's carnations or daisies well, you get the picture. You can't go wrong with a beautiful spring bouquet. This time of year we are all looking for some signs of spring. Especially with this freaky winter with all the cold and snow. The love potion here is the thought you put into it. If you purchase them yourself, put the flowers in a pretty vase (not one from home this is the time to spring for a new one and they will be located right there in the floral department) and tie a little bow or some pretty raffia around it to spruce it up a little. (Ok, look up raffia in your online dictionary...I'll wait.) You could also wrap the flowers in floral paper and give them that "Florist Bought" look. There's really nothing wrong with taking flowers to your special valentine, but really if your valentine works with other valentines...the delivery at the ole place of work still garners the biggest smiles. Along with some chocolate a nice romantic card and maybe a cutsie teddy bear for those girls who still like their "toys." Teddy bears aren't really my thing....now my "Toys" are geared more for the big girls...if you know what I mean. Those are fun to get, too!!
Have fun! After all, this is the time we all get the chance to be silly in love and say and do goofy things. Most of all, turn on the romantic in you and let the love of your life know how very much she (or he) is loved.
AT HOME ON THE RANGE CATERING (615)525-8336

Sunday, January 23, 2011


FOR THE LOVE OF FRYING........


I love, love, love really good fish and chips, but unfortunately I have not had them as often as I'd like. That's not to say I haven't ordered them many times. It means they weren't so good most of the time. But, when they've been good, I have returned and ordered them again. Why take a gamble when you have a sure thing? Here in Nashville, I have eaten good fish and chips at, let's see....3 places. I'm not implying that they don't know how to make fish and chips here in Nashville. Not at all. I'm sure there are plenty of places that I haven't even heard of that have terrific fish and chips. It's just that when I go out to eat, I have usually targeted in on something in particular that I am craving and when I order what I want and it's really good, well, that place becomes the place for that particular goodie. Makes perfect sense to me.
So, what to do when it's too damn cold to get out and you have that hankerin' for some beer battered, fried goodness? You go to the freezer, get out your cod loins.(yes, cod loins, who knew?) dig into one of your favorite "all purpose" cookbooks, get a recipe that sounds good and get to work. My ole faithful recipe book is the Better Homes and Garden New Cookbook. They have an annual one that updates yearly and I have the one from a couple of years ago. It's their limited edition, breast cancer awareness one. It's pretty and yes, it is pink.
I found a recipe that sounded just right. Geraldo found a leftover (how did that happen?) Foster's beer in the back of the fridge and we were on our way to fry town.
Like every good southern cook, I have a deep fryer on my counter. I cranked it up to 375 and got to work on the chips. Fries, that is and did them the 2 cook version (that's another blog.) I got the "chips" cut, blanch fried and popped into the freezer before fry #2, and went to work on the fish. I cut the "loins" in half and made the batter exactly as the recipe says. I don't fool around with batter. Anything with flour and baking powder in it, is too much like baking to me. There's some chemistry going on in there and I don't mess with anything that starts bubbling before you start cooking it! I did some shrimp, too, only with a different batter. Some seasoned flour and cornmeal, egg and some milk. They were delicious, also. And I'll post the recipe another time. They were a perfect pairing for this fish fry platter.
So, after the 2nd fry on the chips* (see recipe below) I put them into a 300 degree oven, dipped the fish into the beer batter, fried them to a golden brown. Served it all up with with homemade tartar sauce, lemon wedges and authentic pub-style malt vinegar. They were great, folks. No kidding. I impressed myself and I don't do that as often as I'd like.You gotta make these. Use a good brand of frozen steak fries for the chips to make it easier on yourself and use one more piece of fish than you think you'll need. Somebody's gonna want that extra one, trust me. And drop some globs of the batter into the hot oil and you'll have crumblies just like Captain D's. Only fresher, lighter and much tastier. Cheers!!

Beer Battered Fish and Chips
Ingredients
1 pound fresh or frozen skinless fish fillets, about 1/2 inch thick
1-1/4 pounds medium potatoes (about 4)
Shortening or cooking oil for deep-fat frying
1 cup all-purpose flour
1 cup beer
2 eggs
1/2 teaspoon baking powder
1/2 teaspoon salt
1/2 teaspoon black pepper
Coarse salt (optional)
Tartar Sauce(optional)
Malt vinegar or cider vinegar (optional)
Directions:
1. Thaw fish, if frozen; cut into 3x2-inch pieces. Rinse fish; pat dry with paper towels. Cover and refrigerate until needed.
2. For chips, cut the potatoes lengthwise into about 3/8-inch-wide wedges. Pat dry with paper towels. In a 3-quart saucepan or deep-fat fryer heat 2 inches of shortening or cooking oil to 375 degrees F. Fry potatoes, one-fourth at a time, for 4 to 6 minutes or until light brown. Remove potatoes and drain on paper towels. Sprinkle lightly with sea salt. When all are fried, transfer potatoes to a wire rack on a baking sheet, arranging them in a single layer. *Put into freezer before 2nd fry. After 30 minutes in the freezer, and making sure your oil is still at 375 degrees, fry the chips a second time until the "chips" are golden brown and as crisp as you like. Keep warm in a 300 degree oven.
3. Meanwhile, for the batter, in a medium mixing bowl combine flour, beer, eggs, baking powder, 1/2 teaspoon salt, and the pepper. Beat with a rotary beater or wire whisk until smooth. Dip fish into batter. Fry fish in the hot (375 degrees F) fat, one or two pieces at a time, until coating is golden brown and fish begins to flake when tested with a fork, turning once (about 3 to 4 minutes). Remove fish and drain on paper towels. Transfer fish to another baking sheet; keep warm in the 300 degree F oven while frying remaining fish. To serve, sprinkle with sea salt or coarse salt. Don't forget the tartar sauce, lemon wedges and malt vinegar on the side. I like to have options.

Lisa Rilying-Schmidt "Comfortcook"
At Home On The Range Catering
615-525-8336
comfortcook@gmail.com
lisagschmidt@hotmail.com

Wednesday, January 12, 2011

SPAGHETTI AND MEATBALLS


Sam called last night at the last minute wanting to know if he could cash in a couple of his food vouchers for something off the new stove. First of all, I haven't handed out any food vouchers and when he called, I was already planted in the sunroom with wine in hand. Too many good leftovers in the fridge, so Geraldo and I were cleaning out the shelves to make room for new groceries. Which translates to no cooking for me. Okay, I did cook some egg noodles to go with the leftover broth from the beef short ribs I'd made on Sunday. But, that was the extent of my time at the stove last night. So, I told Sam that I might cook tonight. I started thinking about what needed to be cooked and what was easy. And what makes enough for a small army. The light bulb in my head went off when I thought of the ground chuck in the refridgerator and all the pasta I have in the pantry. And I get home early enough to cook some sauce, so I'm thinking Spaghetti and Meatballs. Now, there are a kazillion recipes for spaghetti and meatballs and this one is a really good one. (See older post "On Top Of Spaghetti" for another). It does take a little time, but it's so worth it. On a day like today when the weather's a mess and you can't go anywhere, get in the kitchen and play. I always have these ingredients on hand. Of course I do. I have a mini grocery store and butcher shop at The Schmidt House. Just ask Geraldo. But, you know? It sure makes sense when you need a can of cream corn or some chopped green chillies. And you never know when you might need a spring roll wrapper! Makes me a popular neighbor, too. I have been called upon more than once to pull a rabbit out of my hat and save them a trip to the grocery store. And that's why I get those last minute phone calls from my boys checking to see what Mama's got on the stove for supper. You see, "Mama don't stove" like she used to, not since those boys got out of the house. Best to call ahead and make a reservation. Or better yet, check to see if the kitchen's even open!.......Here's the recipe.
SPAGHETTI AND MEATBALLS

Meatballs:
1/2 pound ground pork
1/2 pound ground veal
1/2 pound ground beef
2 large eggs, lightly beaten
1/4 cup grated Parmesan cheese
4 cloves garlic, finely chopped and Sauteed
1/4 cup dry bread crumbs
1/4 cup finely chopped parsley
1 tsp dried oregano
Scant bit of cream or half and half, to moisten the bread crumbs
Salt and freshly ground pepper
1 cup pure olive oil
Tomato Sauce:
2 tablespoons olive oil
1 large Spanish onion, finely chopped
4 cloves garlic, finely chopped
2 (28-ounce) cans plum tomatoes and their juice, pureed in a blender
1 bay leaf
1 small bunch parsley
Pinch red pepper flakes
Salt and freshly ground pepper
6 basil leaves, chiffonade
Spaghetti:
12 cups water
Salt
1 pound #8 or #9 spaghetti
Freshly grated Parmesan cheese
Garlic Bread:
1 stick soften butter
4 cloves minced garlic
1 country loaf, cut into 3/4-inch slices

Directions
For the Meatballs: Combine all the ingredients in a medium bowl, except olive oil and season with salt and pepper to taste. Heat the oil in large saute pan over medium-high heat. Roll the mixture into 1 1/2-inch balls and fry until golden brown, but not cooked through completely. (remove with a slotted spoon to a plate lined with paper towels.) For the Tomato Sauce: Heat olive oil in a medium saucepan. Add onions and garlic and cook until soft. Add pureed tomatoes and juice, bay leaf and parsley, pepper flakes and salt and pepper and bring to a boil. Reduce heat, add meatballs and let simmer for 30-40 minutes, until the sauce has thickened. Remove the bay leaf and parsley, add the basil and serve.
For the Spaghetti: Bring salted water to a boil. Add spaghetti and cook until al dente. Drain well in a colander, (do not rinse and reserve some of the pasta water if needed to thin sauce), toss spaghetti in sauce, serve with meatballs and Parmesan cheese.
For the Garlic Bread: Combine butter and garlic. Spread evenly on bread and broil until browned.
At Home On The Range Catering
615-525-8336

Tuesday, December 28, 2010

HOW THE GRINCH ALMOST STOLE CHRISTMAS....Dinner


"There is no sadder story of cooking woe, than that of Lisa and her kitchen stove."
One of the biggest cooking days of the year would have to be Christmas, right? And this year we had relatives coming and no telling who else walk through our door at any given time, throughout the day. I was on top of my game. Had my menu all made out, the groceries were laid on the counter with care; in hopes that deliciousness soon would be there. Yep, I'd done most of the prep work for our holiday meal a couple of days in advance and was feeling the stress dissipate. One of those days was the entire afternoon dedicated to the baking and structuring of a three layer Red Velvet cake. Wait. What? Three layers? Not 4? That sounds odd, doesn't it? Well, thus began the slowly, but oh so surely, demise of my oven and any chance of keeping and maintaining a temperature of 350 degrees.

350 degrees. The temperature that every cake mix recipe, cookie baking recipe and bird roasting recipe command you to bake with. Even if you get the opportunity to start out high, say 450 or 400, you are eventually going to have to fine tune your entree to 350 degrees.

With my four layers of beautiful, red cake batter in their new parchment lined baking pans, I double checked my oven thermometer and when we hit it straight up on 350, I gently slid in the 4 pans and set my timer for a couple minutes shy of the suggested baking time. Even at this point, because of my tumultuous history with this oven, I knew I had to be on the ball and keep an eye on things. Well, this was the beginning of what was to come in the 3 days ahead, with a turkey breast to roast, a ham we would glaze and bake, 7 pounds of scalloped potatoes and a ridiculous amount of Yankee dressing. All waiting for and counting on the oven from hell not to fail.

After getting through the best 3 out of 4 layers of red velvet cake, held together with 6 bamboo skewers and a bucket full of stucco, I mean cream cheese frosting, I managed to hold the cake together after the initial collapse. You just cannot bake a cake at varying degrees and expect the layers to turn out right. This is baking, folks, Ugh. Getting it close is not an option. Good thing I checked the cake the night before our dinner, cause sure enough, when I brought it in to show Geraldo, it was split open like something out of a Jules Verne movie. More frosting please! And this time it held together long enough for me to make that initial cut and share my baking perils with my guests just in case the house of cards came tumbling down. The cake tasted really good.....but it took a lot of architecture to hold those layers together.

The turkey breast I had brined to ensure it's juicy goodness, ended up baking anywhere from 450 to 250 with no 350 at any time. I didn't think it would ever get done and when it did, my juiciness had dried up like a river bed in death valley. The dressing? Luckily, Geraldo likes drier, crunchy dressing. I did not know that before Christmas Day. (Or maybe he was doing what he does and trying to make me feel better when I fall short in the cooking department.) Now, the potatoes were good. I had par boiled them a bit the day before in order to speed up the cooking time and that turned out to be a foresight of genius. And 5 kinds of cheese, a bechemel sauce and starch is going to taste good, no matter what.

Our family was together and when we sat down to eat, all that angst disappeared and again I learned the lesson that it's not what's on the table...it's who's around it.

I've been online the last couple of days emailing descriptions of various kinds of ranges back and forth and taking home pictures of our new stove. Nope, I don't know for sure what it will be yet, but Convection is most definitely in my very near future and a warranty. A big, fat warranty.
HAPPY HOLIDAYS and HAPPIEST OF NEW YEAR'S


Tuesday, November 30, 2010

A COOKIE ENCORE


COOKIE TIME IS HERE ......Cookies move to the head of the class during the holidays and folks get crazy with their cookie recipe swaps. I first printed this recipe a year and a half ago, but I know that its asking a lot for any readers to go to the archives or the recipe list and find something interesting in here, so I'm making it easy and sticking this recipe in your face....again. Cause it's that good.


OUR FAVORITE CHOCOLATE CHIP COOKIE

Baking good cookies usually doesn't happen the first time a novice baker pulls out a recipe, cookie sheet and a mixer. Nope. Even that first time you slice into a roll of prepared cookie dough, chances are you're gonna be disappointed with the results. Too many things can go wrong if you aren't experienced in the fine art of baking cookies. You have to have a dependable oven, and by that I mean one that doesn't fluctuate in temperature 50 to 75 degrees, and you better know the difference in baking times for a dark colored, light colored, or shiny cookie sheet. Do you really have to put the cookies 2 inches apart? And do you grease the pan even if the batter has a whole stick (or two) of butter in it? What difference does it make if I don't know if the flour in my canister is All Purpose or Self Rising? And nobody who doesn't bake regularly has brown sugar on hand that isn't as hard as a brick.....surely you can just double the amount of regular sugar the recipe calls for. Right? I can...right? Hmmmmm....
People, this is why some folks who cook don't bake. It's like chemistry. An exact science. Strict guidelines. You have to measure. And plan ahead...... like making sure you have some ingredients at room temperature. Don't try to mix in that stick of butter straight from the fridge. Ain't gonna happen.
Even the prepared cookie dough in the tube can fail miserably if you get any of the aforementioned rules wrong. The wrong pan or 25 degrees too hot or even when it says bake for 9 to 11 minutes and you're off by 1 minute and you start smelling that cookie smell.....by then it's probably too late and you're cookies bottoms are toast. It takes time, patience and batches of cookies to begin to feel remotely confident that every batch you bake is gonna turn out great. The margin for error is high simply because too many things can go wrong.
I do not use shiny cookie sheets anymore. I keep a thermometer in my oven. I buy parchment paper now. But most importantly, I read the recipe all the way through before I begin and I follow the recipe exactly. Using real measuring cups with actual amounts listed on the side and measuring spoons. A measuring teaspoon spoon and a measuring tablespoon spoon. I guess you could say I act more grown up when I'm baking. I save the experimentation and over seasoning for the more easily adaptable (or repairable) casseroles and meat loafs.
I have to admit that since I really applied myself a few years ago my baking has improved. I don't play around when I'm baking. I'm dead serious and not nearly as much fun as I am when I get to pull out all my herbs and spices, cheeses and creams. Nope, not much fun until after the baking, that is. Then it's payday!! There's nothing like that bite of something chocolaty or gooey when it's still warm from the oven. I am a Hero then. A real chip off the ole June Cleaver!
I'm still not as confident baking as I am with my pots and pans, skillets and grills, but I'm gonna keep at it till I can call myself a baker and mean it. And I'll scrape the brown bottoms of cookies in the meantime!!
Below is our favorite Chocolate Chip Cookie Recipe here at The Schmidt House.....Nothing fancy here and no big secrets. I got it off the bag of Gold Medal flour a coupla Christmas' ago and they're great. So be brave... and get your butter out, check your brown sugar and cut you some sheets of parchment paper. We're gonna bake us some cookies!!!

BUTTERY CHOCOLATE CHIP COOKIES
1 1/2 cups butter or margarine, softened
1 1/4 cups granulated sugar
1 1/4 cups packed brown sugar
1 tablespoon vanilla
2 eggs
4 cups Gold Medal® all-purpose flour
2 teaspoons baking soda
1 teaspoon salt
1 package (24 ounces) semisweet chocolate chips (4 cups)
1. Heat oven to 350ºF. Mix butter, sugars, vanilla and eggs in large bowl using spoon. Stir in flour, baking soda and salt. Stir in chocolate chips.2. Drop dough by rounded measuring tablespoonfuls about 2 inches apart onto ungreased cookie sheet.3. Bake 12 to 15 minutes or until light brown. Cool slightly. Remove from cookie sheet to wire rack; cool. Pat yourself on the back and ENJOY!!!

Saturday, November 20, 2010

A Little Bit Comfort, A Little Bit Rock 'N Roll: Brine It For "GOODNESS" Sake!

A Little Bit Comfort, A Little Bit Rock 'N Roll: Brine It For "GOODNESS" Sake!

Brine It For "GOODNESS" Sake!

Here I go again, so for those of you who have heard this sermon before, I apologize. And if you haven't followed my lead....time to do so. For any new converts, I want to share of the very best cooking tips I know of and one that is so essential this time of the year, in particular.
I have gone on and on in past blogs about the benefits of brining a bird. Big bird, little bird, fried or roasted. If you've never tried it, do yourself a favor and make this the year you take that leap of faith and take a walk on the wild side....so to speak. When I first started brining my holiday turkey a few years ago, brining was not really very mainstream, but you can bet a few really great turkey recipes had brining as a big part of that magic ingredient lots of us could never quite put our finger on or get right. Now brining is out of the closet and rightfully so. The method is front and center of every Thanksgiving edition of all the cooking magazines and on every Food Network rerun between now and Christmas. I like to think I was cutting edge: You know.....brining when brining wasn't cool.
There are several brining recipes out there and you can pretty much count on all of them. The trick is to get the right ratio of saline (salt) and liquid. I am a purist, using water or a combination of apple cider and water, with salt, but the newest versions offer up all kinds of concoctions adding peppercorns, any poultry herb or seasoning you usually reserve for the bird, and some of the good ole southern versions, use sweet tea or tea bags. Yes, really.
I guarantee you will have the moistest turkey ever and everyone will ask you how you did it. I brine anything with wings before roasting, frying or baking. So, go find a big, ole cooler and get ready to knock their socks off with your new Thanksgiving tradition.
I'm giving you the link to Alton Brown's recipe 'cause you brining doubters might trust his credentials more than mine. Why him being a Food Network Star, Food Scientist, Referee of the Iron Chefs and all....I'd say he has some "chops" and knows his "stuff"-ing. You'll thank me later when you become a convert and baptize your bird in brine for the first time.
My version? I use water and salt, a cooler and some ice. An elementary version of My Roasting Recipe? Simply said......
Rinse your brined turkey and dry well. Make sure you pat the skin dry. Then I put unsalted butter under under the skin of the breast and legs, and smear lots more all over. Then salt and pepper inside and out, and a few sprigs of fresh sage, parsley and thyme in the cavity with a split, unpeeled onion. Last year I threw in a couple of carrots cut in two and a coupla ribs of celery with the leafy tops. I don't go coo-coo with rosemary because I think it's a bit too strong, tho it does look pretty as a garnish on the platter. I am fortunate that I have fresh herbs year 'round (thanks, Geraldo!!!) and one of my happiest moments is when I go out to harvest them for a big holiday meal. I keep a small saucepan of unsalted butter on a warm back burner so I can baste the turkey for the last hour of cooking. I also use the turkey drippings to baste with. (All this goodness at the bottom of the pan mixed with a little flour and chicken stock make for a delicious pan gravy.) I start my bird breast side up and high heat. Around 400-425 for 45 minutes, till the breast starts getting nice and golden brown, then I adjust the oven to 350 and cook till a meat thermometer reads 180. (Don't cook your turkey for 4 hours like folks used to. That's a little long, unless you got a giant turkey. That's a whole 'nother blog!!) Make sure to read the cooking and time directions that come on the label of your bird and go by that. And please, do use a meat thermometer when you think it might be done. Rotate the turkey in the oven for even browning and if any parts start getting too brown, use some aluminum foil to cover them.
Let your finished turkey rest on the counter, tented in foil for at least 30 minutes before carving. There is a lot of cooking still going on after it's out of the oven. Pinch yourself off some of that good crunchy skin when no one's looking and cut a chunk of white meat from the neck end, or a piece of dark meat from the bottom of the thigh if you prefer the dark meat. The point is, you have wrestled this delicious piece of art for 2 days, brining and roasting, and deserve first dibs. And let's face it....if you're like me, you can't wait any longer....Get 'ya some!! I feel that's just good, quality control. Now, go brine a bird and see what I've been squawking about!
Below, from the Food Network, online and published in this month's Thanksgiving edition of their magazine, is this great recipe from Alton Brown.
ALTON BROWN'S BRINING & ROASTED TURKEY RECIPE
http://www.foodnetwork.com/recipes/alton-brown/good-eats-roast-turkey-recipe/index.html

I am.....
COMFORTCOOK@gmail.com
And we are....
"AT HOME ON THE RANGE CATERING" lisagschmidt@hotmail.com
Nashville, TN- 615-525-8336
I would love to hear from you!!!

Thursday, November 11, 2010

I've Missed Y'all!!


Forgive me, Food Friends, for taking such a long sabbatical from the blogging world. I got caught up in the day to day drama that makes the world go 'round and me tired at the end of the day. Yes, I was working 8 to 5 and was tired of looking at a computer screen by the end of the day, much less spend more time at a keyboard. I no longer had the luxury to sit around in the afternoon thinking of smart, witty and clever things to blog about. It was time to get up and hit the bricks and help put some real food on the table. Earn my worth, so to speak. I prefer blogging, but the pay is lousy!


'Nuff said! Tho, I am still on the clock from 8 to five, Monday thru Friday, I am back for a bit altho it may be inconsistent and not quite as witty. I want to spend some time sharing some food and family stories over this holiday season. I love this time of year when a turkey gets star billing and a side dish completes the story. A food lover's favorite time of the year....along with Easter ham, Memorial Day picnics, summer barbecues, hot dogs / burgers on the 4th of July and the big labor Day finale of any and all things grillable. Food is never out of season, I just think it really gets the most attention when the leaves begin to turn and families gather inside around tables loaded with family favorites, old and new, Grandma's favorite pumpkin pie recipe, some smarty pants trying a new stuffing, and those delicious Christmas cookies that deserve their own cookbooks.


While I begin to think of something inspirational and thoughtful to blog about, I hope you will take the time to go back into the Ole Comfortcook archives and brush up on some seasonal recipes and stories. I'll be back with you soon. I've missed our time together and I'm looking forward to "seeing" you again soon!

Saturday, February 20, 2010

AS GOOD AS IT GETS


Hey Nashvillians and Carolinians!
Harris Teeter has Crab Legs on sale for $2.99 a pound! Geraldo stopped at the Brentwood Harris Teeter (LOVE that store) and picked up a big bag for 17.00 bucks that was marked down from $38.00 ($6.99 a LB)! Crab shells will be flying tonight at The Schmidt House. (Yes, I know how that sounds!)
Now, I'm not a person who sits down and eats a lot of any meal at any one sitting. I'm usually pretty tired of what makes it to the table if I've been the one doin' the cooking. I am one of the Quality Engineers in The Schmidt Kitchen (yes, I know how that sounds, too!) along with Geraldo, so there's been lots of tasting going on before the final dish hits the table. So I'm a little tired of it, quite frankly. You could say that dinner and I have been pretty intimate up to that point. I eat a little with everyone, but I'm usually up and down and up and down. But, believe me...I make trips back! I didn't get this way doing aerobics at the dinner table. But, like I've said a dozen times before...give me a table laden with appetizers and finger foods and I am one happy grazer. That's by far my favorite way to eat. A taste of everything and not a lot of any one thing. "Variety they say is the is The Spice Of Life......" Oh please... that was a cheap shot.
The one exception? Well now, I can park myself at a table and put away some crab legs. We used to go out to a favorite sports bar (slash) "all-you-can-eat" crab leg joint and this way before seafood was bastardized at those International Buffets (ugh!) Geraldo would say he'd just take a book. I do indeed take my time with the sweet crustaceans and there's been occasions when we prolly could have used a co-signer!
Crab legs? I like mine simple and often.
Here's a couple of easy ways to cook 'em....

Crab Legs

To boil crab legs, simply fill a large stock pot half full of cold water and bring to a boil. Add a tablespoon of salt and the seasoning of your choice, if any. I usually quarter a lemon and add some Old Bay or Zatarain's Crab Boil to the water. When the water begins to boil add the crab legs and reduce the heat to medium. Allow them to simmer for about six minutes. Take the crab legs out of the water, drain and they are ready to eat. I don't rinse mine, cause I like the seasoning on the shells.
TIP: If you prefer to steam them, use a wide, deep pan and just a couple of inches of water, which can be seasoned, like suggested above. Bring the water to a rapid boil, put the crab legs in a colander in the water or just drop them in...reduce to a medium simmer, cover and let them steam for about 10minutes. You can also grill them, but that deserves it's own post. There's lot of ice cold beer involved with that method and I'm not talking about on the crab.
Melt some butter in the microwave, grab some dish towels and make some elbow room at the table. Lemon wedges on the side and hush anyone who bemoans the fact that you have to "work too hard" to eat them. Sissies. Those are the usually the folks who never cook....ever! Food folks know you gotta put some love and a little effort into anything that comes out delicious! Get to crackin'! And always.....Comfort and Joy!
COMFORTCOOK
"At Home On The Range Catering"
615-525-8336


Friday, February 19, 2010

SOUTH OF THE BORDER


As I was stuck in traffic this morning in front of my favorite little neighborhood grocery, Comptons (mentioned in past posts for their superb meat department), I noticed that along with a great sale on split chicken breasts (always buy them on the bone, Thank You!) they have pork butts on sale for 98 cents a pound. This is not the cheapest I've seen them, but a very decent price and I'm always ready to go "Pork." So, I am putting the pork butt on my shopping list for the weekend and plan on making some Pork Adobada sometime soon. I have spoke about this recipe before , but it is definitely worth another mention. It is so easy and soooo GOOD! Great leftovers and if you need to, it freezes well, also. I love the taste of authentic Mexican food and this dish has all those deep, rich flavors that are so satisfying and just tastes like nothing else. "Nothing else" in my neighborhood, that is! (Ok, maybe those folks on the corner of Town Valley Court and Tea Garden may have a similar recipe, but I know I've got this convered on Pekoe Circle.)

So read the recipe below. Go find a good deal on a Pork Butt and try this dish. If you love Pork, you'll put this one in the recipe box and go back to it again and again. If you love complex, interesting, deep flavors, you'll love this. If you have a crock pot and want to razzle dazzle some company with something totally different and impressive and have time to sit and spend time with them instead of fretting over a stove...this dish is the one for you. Damn! Just try this dish! Don't be intimidated by roasting the peppers. It's good to learn a little trick every now and then, plus you'll feel like a million bucks and proud of yourself after you do it and wonder why you avoided any recipes that called for roasted peppers before. It is a whole new method to adding a lot of flavor to your cooking. It may not be the most complex of Mexican dishes, but it sure as heck isn't Taco Bell! After this you'll be ready to try the Chili Rellenos with Picadillo recipe. That one has some really interesting flavors going on...raisins, cinnamon, clove...I know the combination sounds strange to us gringos, but wow...it is delicious. For sure Chili Rellenos its a lot more more hands on than this, but they are both great ethic additiosn to your recipe box.


COMFORTCOOK -
"AT HOME ON THE RANGE CATERING"
Nashville, TN 615-525-8336
http://www.comfortcook@gmail.com/


PORK ADOBADA

Ingredients:

6 New Mexico Anaheim dried red chilies
4 dried Ancho peppers (These are the dark red dried peppers. Dried Poblanos, actually)
1/2 cup cider vinegar
1 medium onion, chopped
5 garlic cloves, chopped
1 tablespoon ground cumin
1 cup chicken stock
2 tablespoons frozen orange juice concentrate
2 tablespoons brown sugar
2 tablespoons tomato paste
1-2 teaspoon olive oil
1 tablespoon all-purpose flour
3 lbs lean pork, cut into bite-sized pieces (I use Pork Butt , but you could use a loin.)
salt and pepper, to taste


Directions:
Tear chili pods into pieces, removing steam and reserving seeds.
Place chili on baking sheet, preheat oven to 350 degrees.
When oven is hot roast the chili for 10 minutes.
Place the chili in blender container.
Bring the chicken stock to a boil, add cider vinegar and pour over chili.
Allow to sit for about 10 to 15 minutes to soften chili.
Add orange juice concentrate, tomato paste, brown sugar and cumin.
Blend into a smooth paste, add 1 tablespoon of the chili seeds and blend until smooth.
Warm olive oil in skillet, add onions and garlic.
Saute until onions begin to brown lightly then pour onions into crock pot.
Toss the pork with 1 tablespoon of flour.
In same skillet add pork cubes and brown stirring frequently.
May need to brown the meat in batches to ensure even browning,.
As meat is browned, transfer to crock pot.
When all the meat has been browned, pour 1/2 cup water into skillet, bring to a boil and scrape up browned bits.
Pour into crock pot along with chili sauce, stirring well.
Cover and cook on low 4 to 5 or until pork cubes are tender.
Serve with some great garnishes such as Cilantro, grated cheese or Queso Fresco, diced tomatoes, onions, lettuce, lime wedges, Sour Cream and flour and corn tortillas. Let everyone build their own combination. Have lots of Frosty, Cold, Barley Pops (BEER!!) on hand!! El- Schlurpo!


BIG TIP: The Pork Butt is a moister cut of pork than a loin and pork tenderloin would just disintegrate in a crock pot after that amount of time. Pork Loin would work but would be drier. Also, ANYTIME you are using your crock pot, add a layer of foil to the top before putting the crock pot lid on. And NEVER!!! take the lid off during the cooking time. I know it sounds like an exaggeration, but you lose 20 - 30 minutes cooking time each time you "peek" in your crock pot. Have Faith!!

Wednesday, February 10, 2010

Rum Balls!!!!

My friend Debbie made these Rum Balls for a get-to-gether we had last week. They are so delicious and she swears they are very easy to make! They do have bit of a punch, so be forewarned and just so you know, the alcohol isn't baked or cooked out. Try 'em, cause they are really delicious!!! Great recipe, Debbie...Thanks So Much!

Chocolate Rum Balls

1 Box (12 ozs.) Vanilla or Chocolate Wafers
1 c. chopped finely nuts (I used pecans)
1 c. confectioners’ sugar (divided)
1 c. semi sweet chocolate chips
½ c. light corn syrup
1/3 c. bourbon or rum (I used ½ c. rum)

In a medium-size mixing bowl, combine crushed wafers, pecans, and 1/2 cup confectioners' sugar; set aside. In a double boiler over simmering water, melt chocolate morsels with corn syrup. I did melted the chocolate chips in the microwave. I placed the chips in a microwave glass dish, and put them in for 20 seconds, stirred and then placed back in for 15 seconds, and then 10 seconds thereafter until they were melted. Add Bourbon or rum; stir until smooth. Pour chocolate mixture over wafer mixture. Stir to combine thoroughly. Shape mixture into 1-inch balls; place on waxed paper.
Place remaining confectioners' sugar in a shallow bowl. Roll balls in confectioners' sugar; place on waxed paper in a container, adding more waxed paper between layers, or place in small paper or foil candy cups. Store in airtight container for about 3 days before serving. Store for up to 2 weeks.Makes 4 dozen. I keep them in the refrigerator.
Have fun and enjoy!

Thursday, February 4, 2010

So Fond of You!

Valentine's Day is a great time to break out the old fondue pot that has been collecting dust and cobwebs since Aunt Helen rushed out to Bed, Bath and Beyond to check off a wedding present from you gift list. Yes, in the seventies and then for a retro return in early 2000, you had to have one. No God-fearing southern lady who deemed herself a Hostess who be caught dead without that little ceramic kettle and matching long stemmed forks. What a romantic notion of the wonderful cocktail parties ahead or for the young newlyweds consumed with wedded bliss....Ah yes, once upon a time we all think the nights and months ahead will be filled with all those romantic times when we lovingly gaze into the eyes of our soul mate over a melted cauldron of bubbling Gruyere' and feed one another Godiva dipped, chocolate strawberries while draped over a mound of red velvet pillows...toasting one another in front of a cozy fire listening to cool jazz and Michael Buble' CD's. (Is it getting hot in here, or is it just me?)
Fast forward years later.....If we ever used the fondue pot once, I'm sure it became a hassle and the results were not near what was expected and the final result became a pain in the arse as you tried to get all your ingredients together, not burn the cheese and get your fella to stop acting like an old married man and "play along." Face it...he's ready to get to # 7 on your list of 1-10. And that's giving him some credit.
Here's an easy one to help you get back on the Fondue wagon again. Valentine's Day is coming up. It's the first Sunday this year without Football....he'll be bored and a little lost. This is a perfect time to reinvent an old classic.


CLASSIC (and Easy) CHEESE FONDUE

Basic Cheese Fondue Recipe

2 Garlic Cloves, Cut in Half
(2 cups) Dry White Wine
(1/2 lb) Gruyere Cheese, Shredded
(1/2 lb) Emnenthaler Cheese, Shredded
(1 tbsp) Lemon Juice
(2 tbsp) Flour
(3 tbsp) Kirsch
(1/2 tsp) Nutmeg
(1/2 tsp) Paprika
Pepper
1. Rub the garlic inside the fondue pot then discard.
2. Pour the white wine and lemon juice into the pot and turn on the burner.
3. Let the wine and lemon juice warm up without boiling.
4. Reduce heat and add the shredded cheese.
5. With a wooden spoon, mix well and stir regularly.
6. Add remaining ingredients.
7. Add pepper to taste.
8. If the mixture is too hard, add wine. If the mixture is too soft, add cheese.
9. Dip bite size pieces of bread or vegetables.
10. Let the freshly dipped pieces cool off for a few seconds, then enjoy and repeat but no double-dipping!
Note: Italian or French bread (baguette) makes excellent dippers when cut into small pieces. You can also try mild green or red peppers, zucchini slices, steamed broccoli or cauliflower or whatever else you're in the mood for.

Sunday, April 19, 2009

A LESSON FROM THE MASTER


One of my favorite days lately has been the one that I spent with my Mom. I guess you could say that she's The "Original Comfortcook"....from a long line of Comfort Cooks. In the next few posts I'm going to share some of my favorite "Mom Dishes" and perhaps you'll begin to understand why I'm such a foodie and why I love to "Play" with my food. She can still cook circles around anybody I know, just smaller circles now and maybe not as fast...but oh boy! That great taste is still in there. I can prepare it exactly like her...step by step, ingredient by ingredient and it never tastes the same. I know many of you know exactly what I'm talking about. It's that Mother's Love...I just know it. I think my sons are beginning to appreciate that from their own Mama's kitchen. There's something in the way Mom holds her mouth or flicks her wrist or something magical, I guess, that I miss. Maybe slight of hand? A kitchen Houdini? I can keep up...but I'll never pass her. She'll always win that race. So with a lot of my childhood favorites, I've just learned to add a little, "somethin, somethin" to give it my own spin and most of the time I end up with a pretty good replica of one of the master's. I've covered her Potato Salad recipe in an earlier blog (see Potato Salad in the recipe list at the bottom of the page) and that still ranks way up there on my all-time favorite list. I made that potato salad yesterday for a friend's cookout and it was a huge hit...again. One fella even grabbed pen and paper right after he'd eaten and asked for the recipe. Just like with so many of her recipes...there are none. Just good ole cookin' know how. I gave him the best recipe I could..at least I told him what all the ingredients are, along with all the steps, proper temperatures, "I always use russets", you know the basics. Folks are just kinda on your own from that point on. Unlike with her baking, I've never seen Mom measure anything that goes into that potato salad. I get it pretty darn close....or so I think till I eat hers again!

Another one that is so simple and so delicious is her cheese salad. Not the Pimiento Cheese salad of the south. Close. But this, too has a quirky little difference. She uses pimiento stuffed green olives and Miracle Whip. Now, I'm a Mayo girl, but Mom is Miracle Whip all the way. I don't think she even has any mayo in her house. That pleases Geraldo to no end. He's a M.W. kinda guy. So, of course he prefers her potato salad to mine..(but would rather both of us leave out the olives!! Geraldo's not an olive man.) You gotta try this cheese salad someday. I'm gonna share the recipe in the next blog. It's so good and my brother Allan and I will still fight over that last bit. I went shopping and bought the ingredients to make it when I was home because she always makes it for us and I sure don't want to lose the opportunity to learn her version of a childhood favorite. You have to use real American cheese. Don't even suggest any "processed cheese product" or mention the V word!! It's not an inexpensive dish to make...but it's totally worth the extra bit to make a really superb product. I had it for my lunch at work for 3 days. It's great just on plain white bread, but it's also excellent when prepared like a grilled cheese. So, I bought the right cheese and she had all the other ingredients so, we got busy as she stood close by and guided me thru the process. I remembered the hand cranked food grinder that she used to screw onto the edge of the counter to make this stuff. She's stepped up to the food processor now and that makes things a little easier. I miss the nostalgia of the food grinder, tho. And man, she's funny...funny "Ha Ha", I mean! We were putting the green olives in the food processor and I asked how many and she said "Well, however many olives you want. How olive-y do you want it?" So, I dropped in a coupla handfuls and started to put the top on the processor and she stopped me..."Put more olives in there! That's not enough! You want it olive-y, don't 'cha?" And I did. I did want it olive-y. So, therein lies the mystical part of figuring out her dishes. You just gotta make it till it tastes right. Until it takes good...just like Mom's. Oh yeah, I left Allan some Cheese Salad in a butter tub for him to pick up. I'm a thoughtful little sister (ahem) and besides, there's no better judge of that particular dish than him!

This is a great recipe for Coconut Pie...Mom's version is another kind that takes patience and time standing over the stove cooking the custard. This is an easier version and it's good. In fact, it's a prize winner from a little old lady in North Carolina that made this for every church supper she ever attended.....Yes, this one has won blue ribbons and County Fair accolades.....but it's not like my Mom's. Hers is THE BEST! I'll include that when I get into her recipe box again and get a copy!! Yes, there's a written down recipe for that pie. Mama don't play when it comes to baking.....

AMAZING COCONUT PIE

A great family favorite.This is one of the simplest recipes for a delicious dessert I've ever tried. Now, I'm not one to judge you if you use a premade pie crust, but you may find you have a bit of filling leftover and how do I know that? Yep, I used a premade Pillsbury "rolled -out" pie crust and it was great. Everytime!

Preheat the oven to 350°F.
1 Unbaked 9-inch pie shell
1⁄4 cup butter, softened to room temperature
1 cup sugar
1⁄3 cup buttermilk
2 large eggs
1⁄4 teaspoon salt
1 teaspoon vanilla
1⁄2 package (31⁄2- to 4-oz.) shredded, sweetened coconut
1. Place the oven rack in the middle position.
2. Cream butter and sugar in the bowl of a standing mixer fitted with the paddle attachment. Add buttermilk. Add eggs one at a time. Add salt and vanilla. Fold in coconut. Pour filling into pie shell. Bake about 40 minutes, or until top is firm and crust is golden brown. Cool completely on a rack. Store loosely wrapped in wax paper in the refrigerator.

Y I E L D : 8 S E R V I N G S

GOODNESS GRACIOUS!

GOODNESS GRACIOUS!
Does it get better than this?

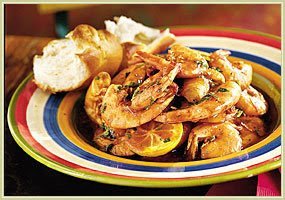
BARBEQUE SHRIMP

BARBEQUE SHRIMP
NEW ORLEANS STYLE!!

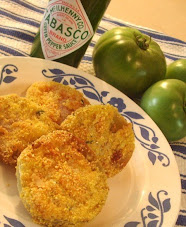
GREEN GOODNESS

GREEN GOODNESS
Ya gotta make you some of these!

SCHLURRRRP!

SCHLURRRRP!
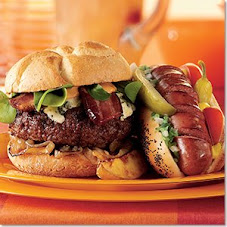
Grilling Burgers? 10 Great Recipes

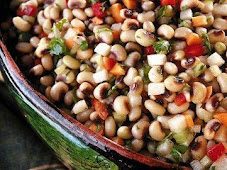
TENNESSEE TEXAS CAVIAR

TENNESSEE TEXAS CAVIAR
This is Soooo good!!

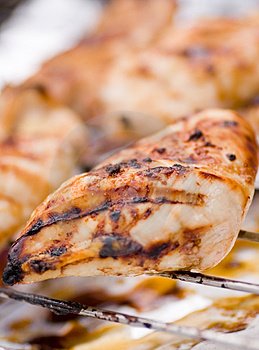
CUBAN MOJO CHICKEN

CUBAN MOJO CHICKEN
Light, And Flavorful!!

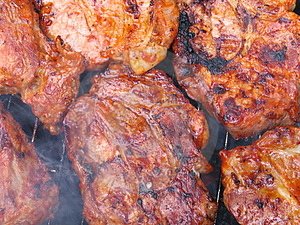
BAR- B -CUED PORK...SCHLURP!!!

BAR- B -CUED PORK...SCHLURP!!!
GREAT TASTING PORK STEAKS!

CRAB CAKES

CRAB CAKES
Wolfgang Puck's Great Recipe Here

FRESH FISH

FRESH FISH
Delicious, Fresh Orange Roughy Recipes

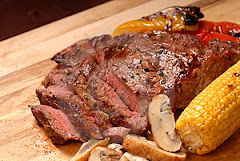
STEAK, STEAK, STEAK

STEAK, STEAK, STEAK

Labels

BlogCatalog

home Blogs - BlogCatalog Blog Directory

Blog Archive

Powered By Blogger

SCHLURP!!!!

SCHLURP!!!!